

C2S – GTM – Templates
Discover the most-read articles
The Affilae templates are two tag templates published in the Google Tag Manager Community Template Gallery. You add them to your container, enter your program ID and your key, and you measure clicks and conversions without writing any code.
This page covers the C2S (client-side) integration through templates. It is the fastest method when your website already runs Google Tag Manager.
Install the Affilae Click Tag
Add the Affilae template
- Log in to Google Tag Manager.
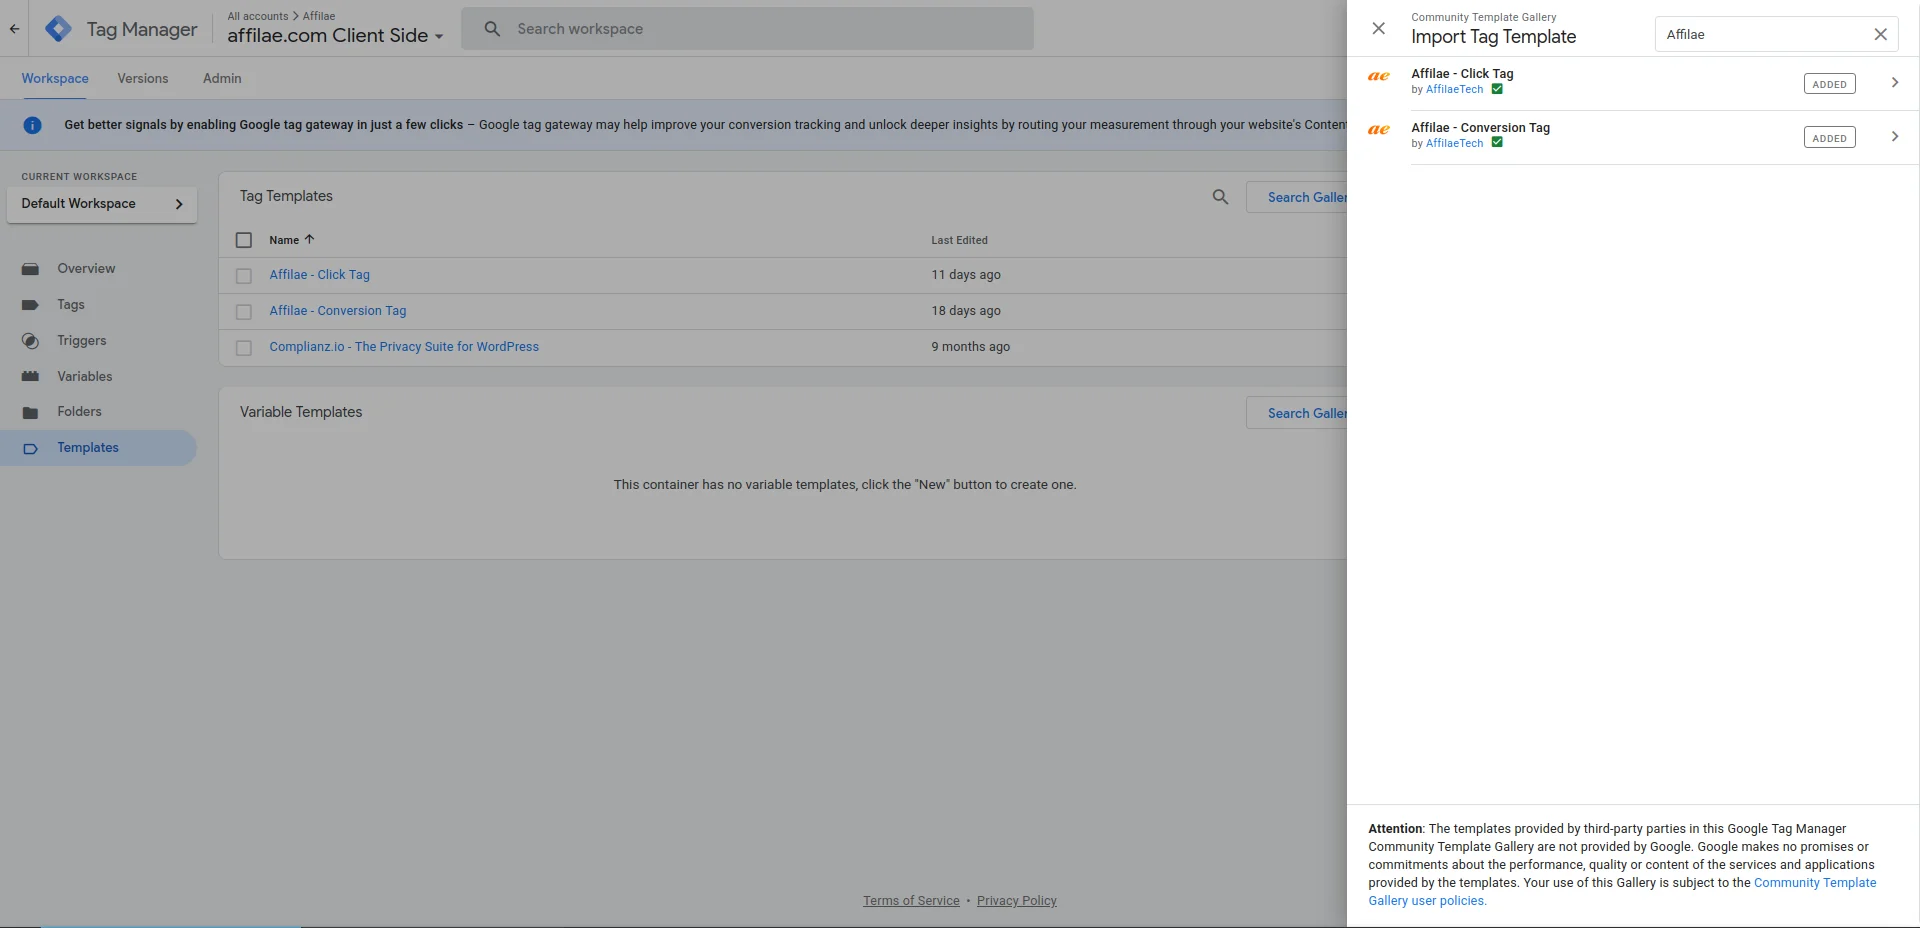
- Go to Templates, then Search in Gallery.
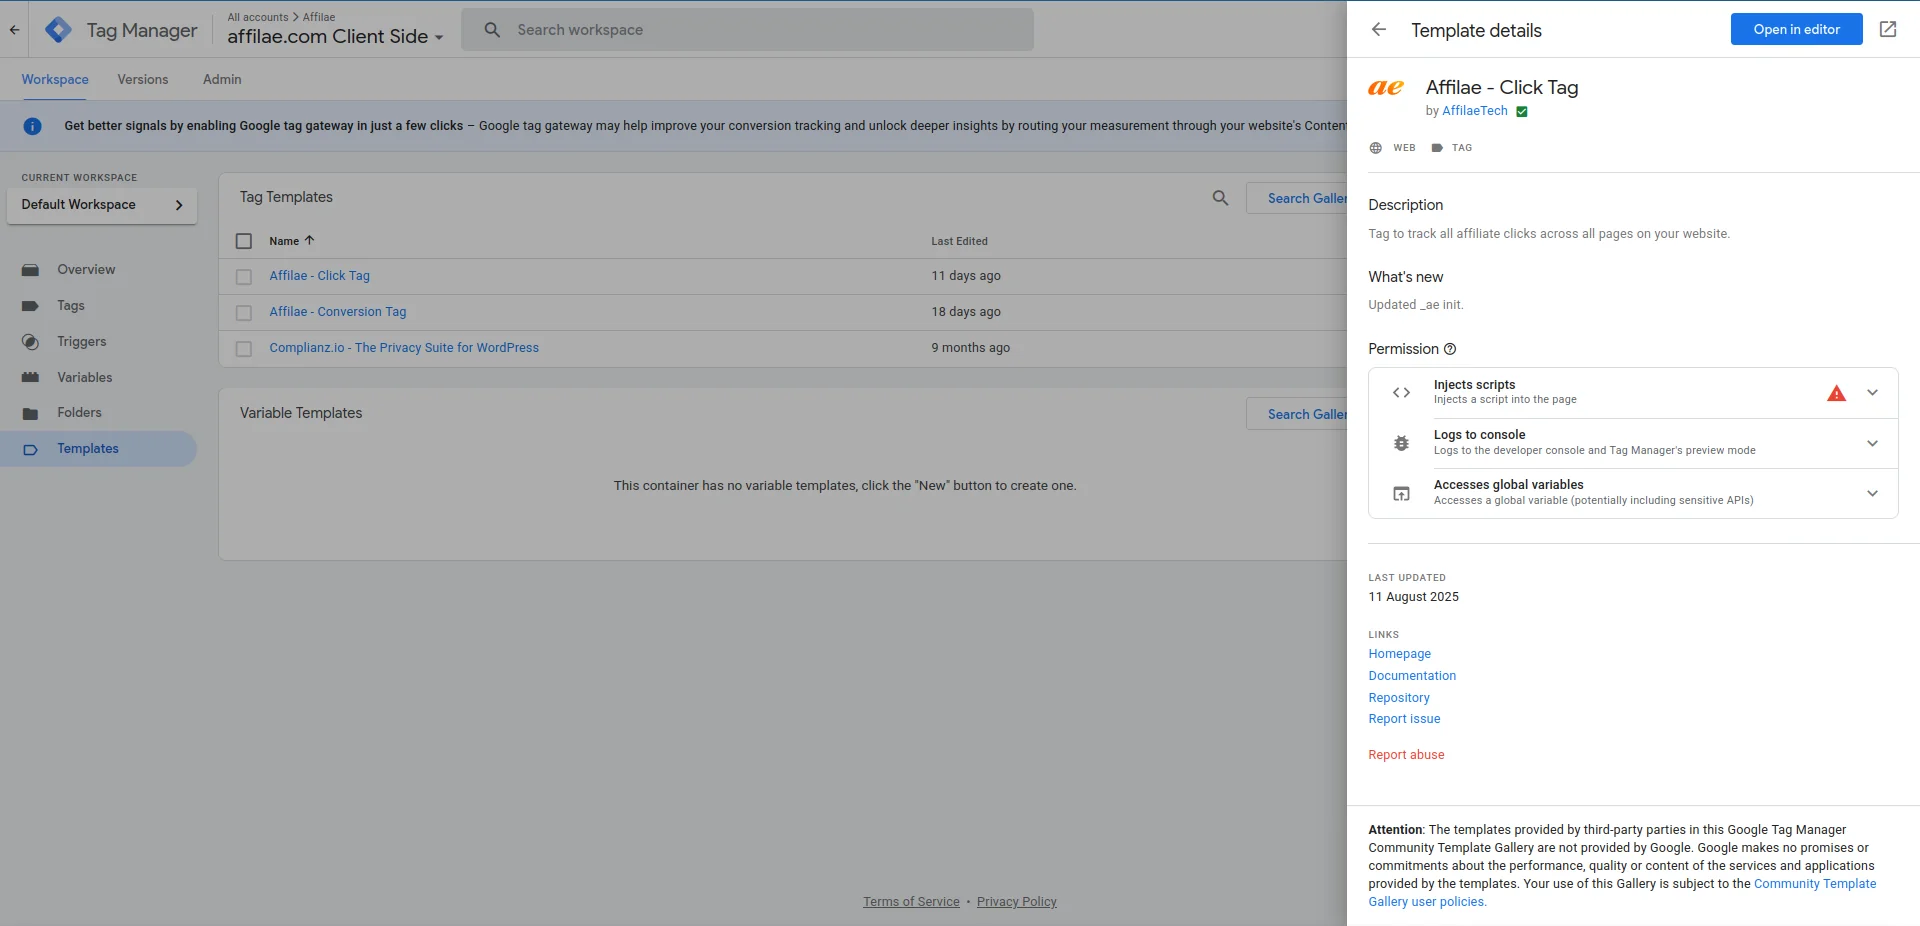
- Search for Affilae and add Affilae – Click Tag.
Create the click tag
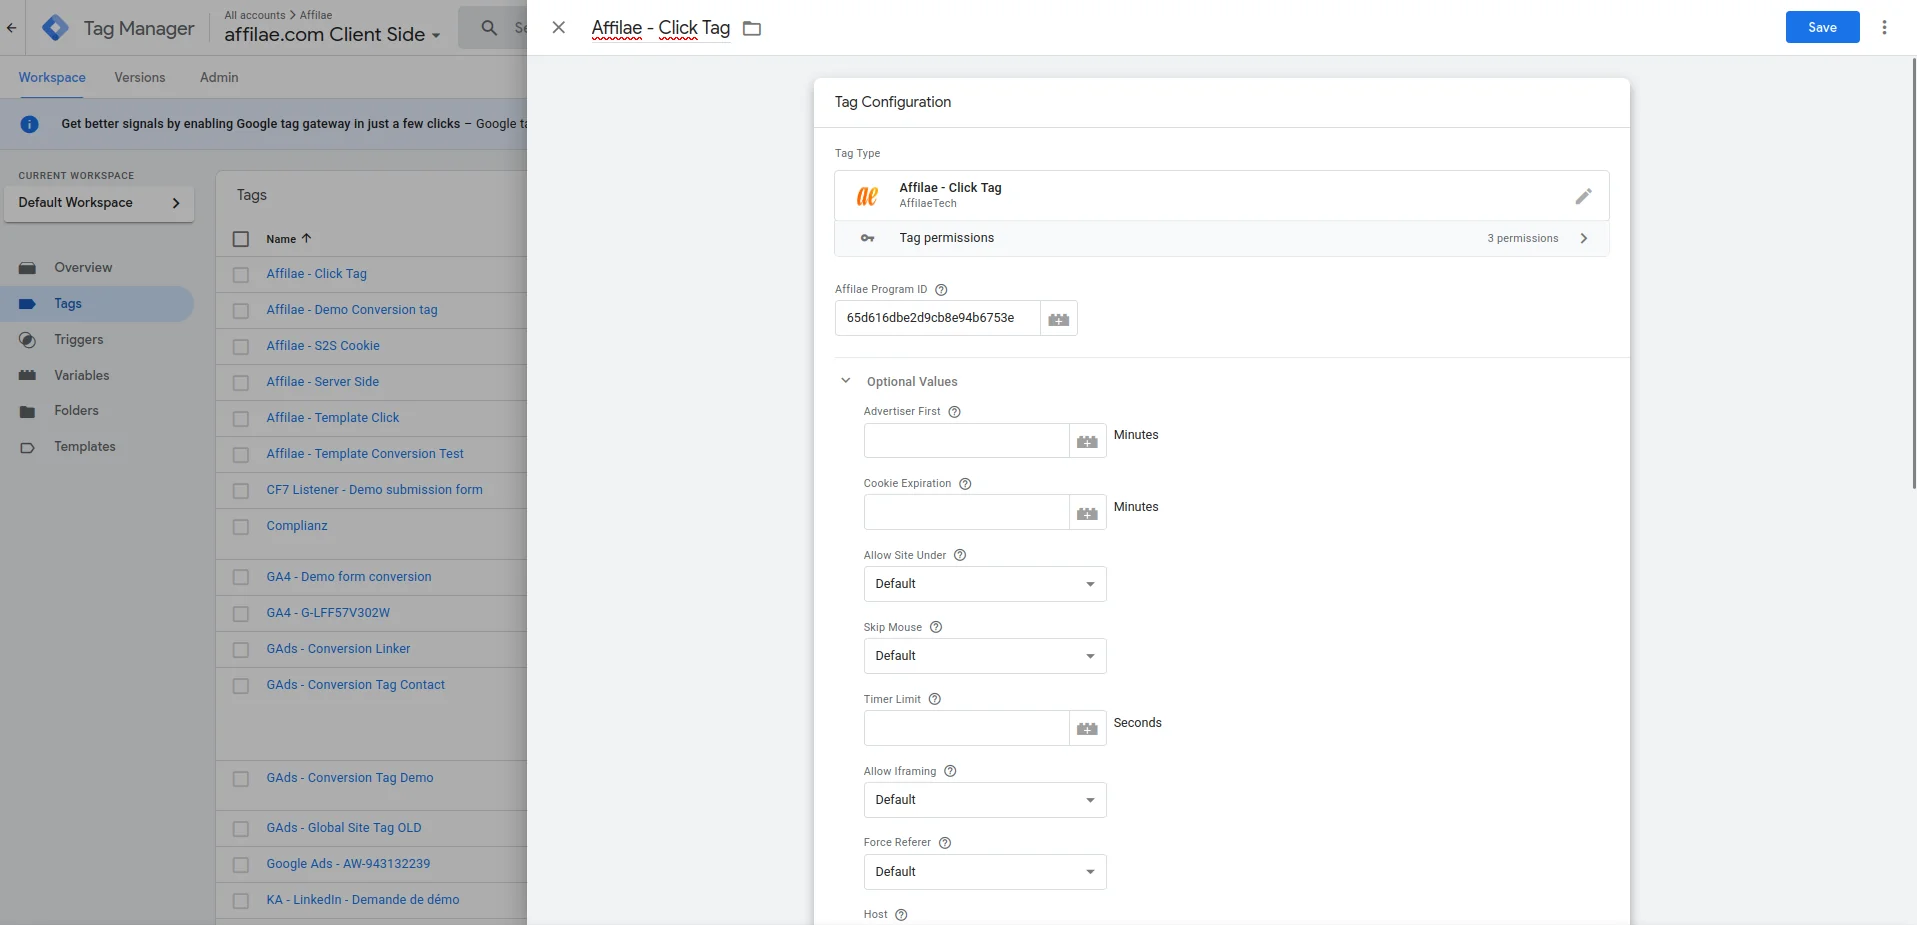
- Go to Tags, then New.
- Name your tag.
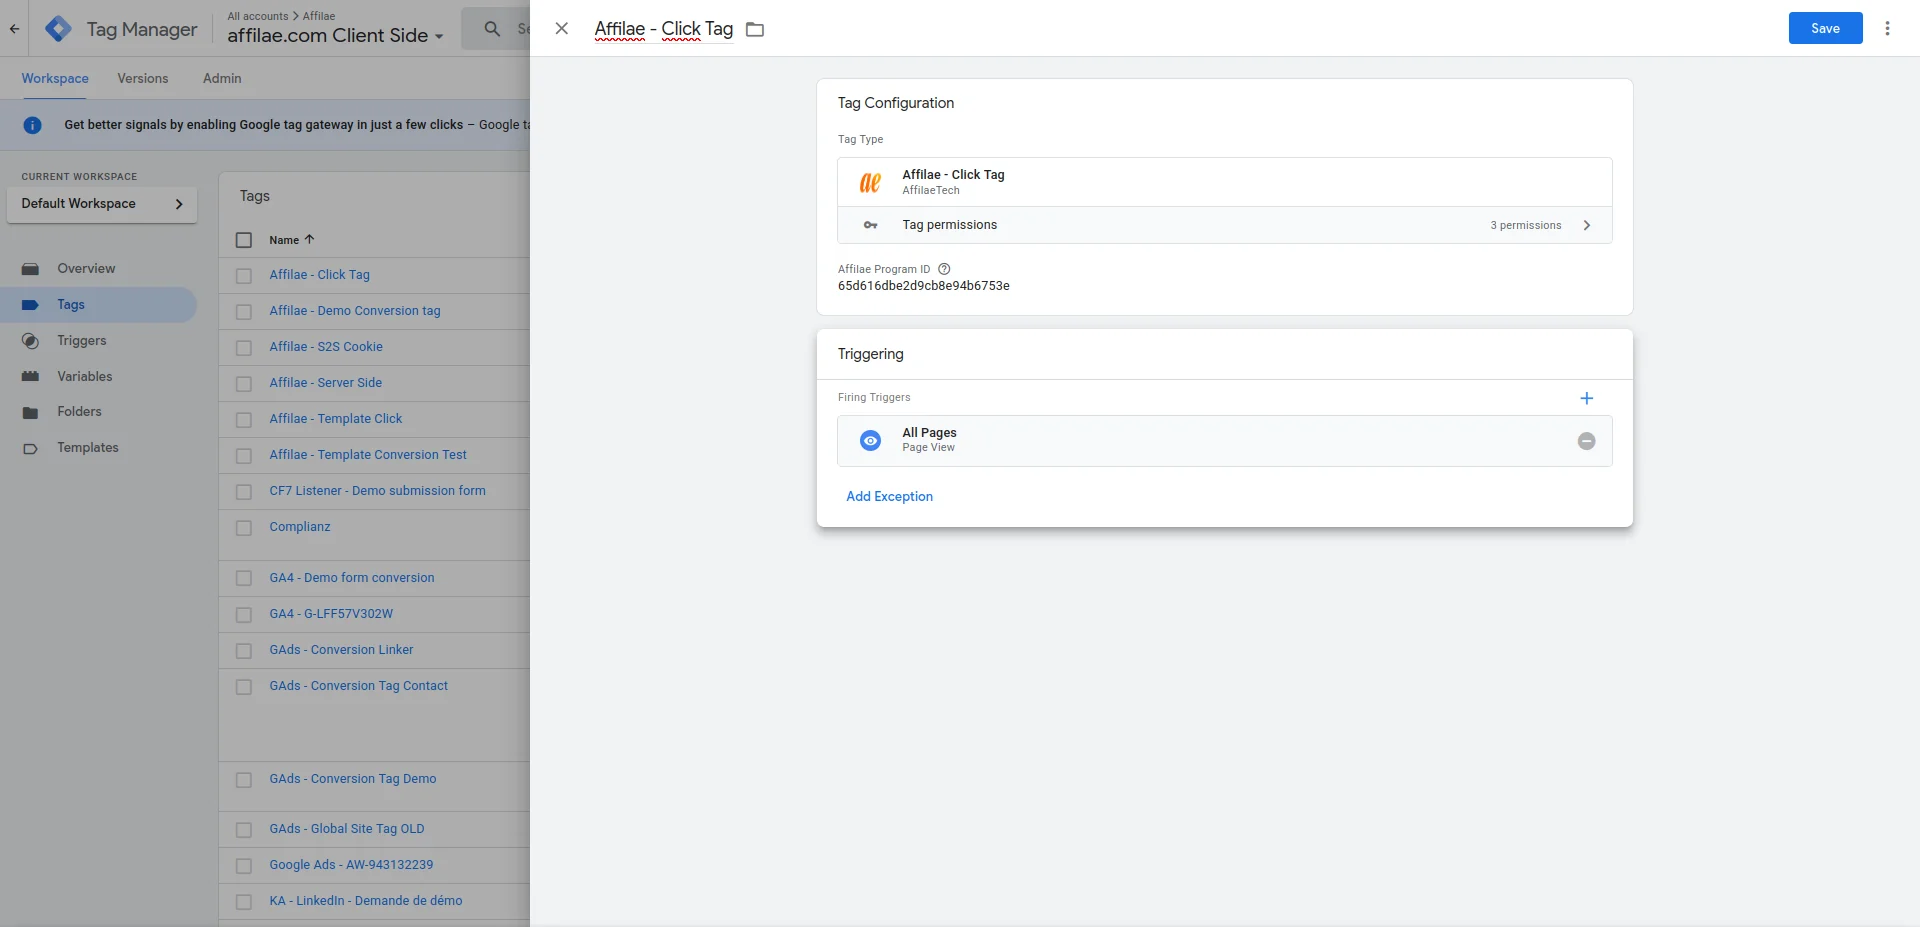
- In Tag Configuration, select Affilae – Click Tag.
- Enter your Affilae Program_ID.
- In Triggering, select All Pages.
- Save and publish.
Install the Conversion Tag
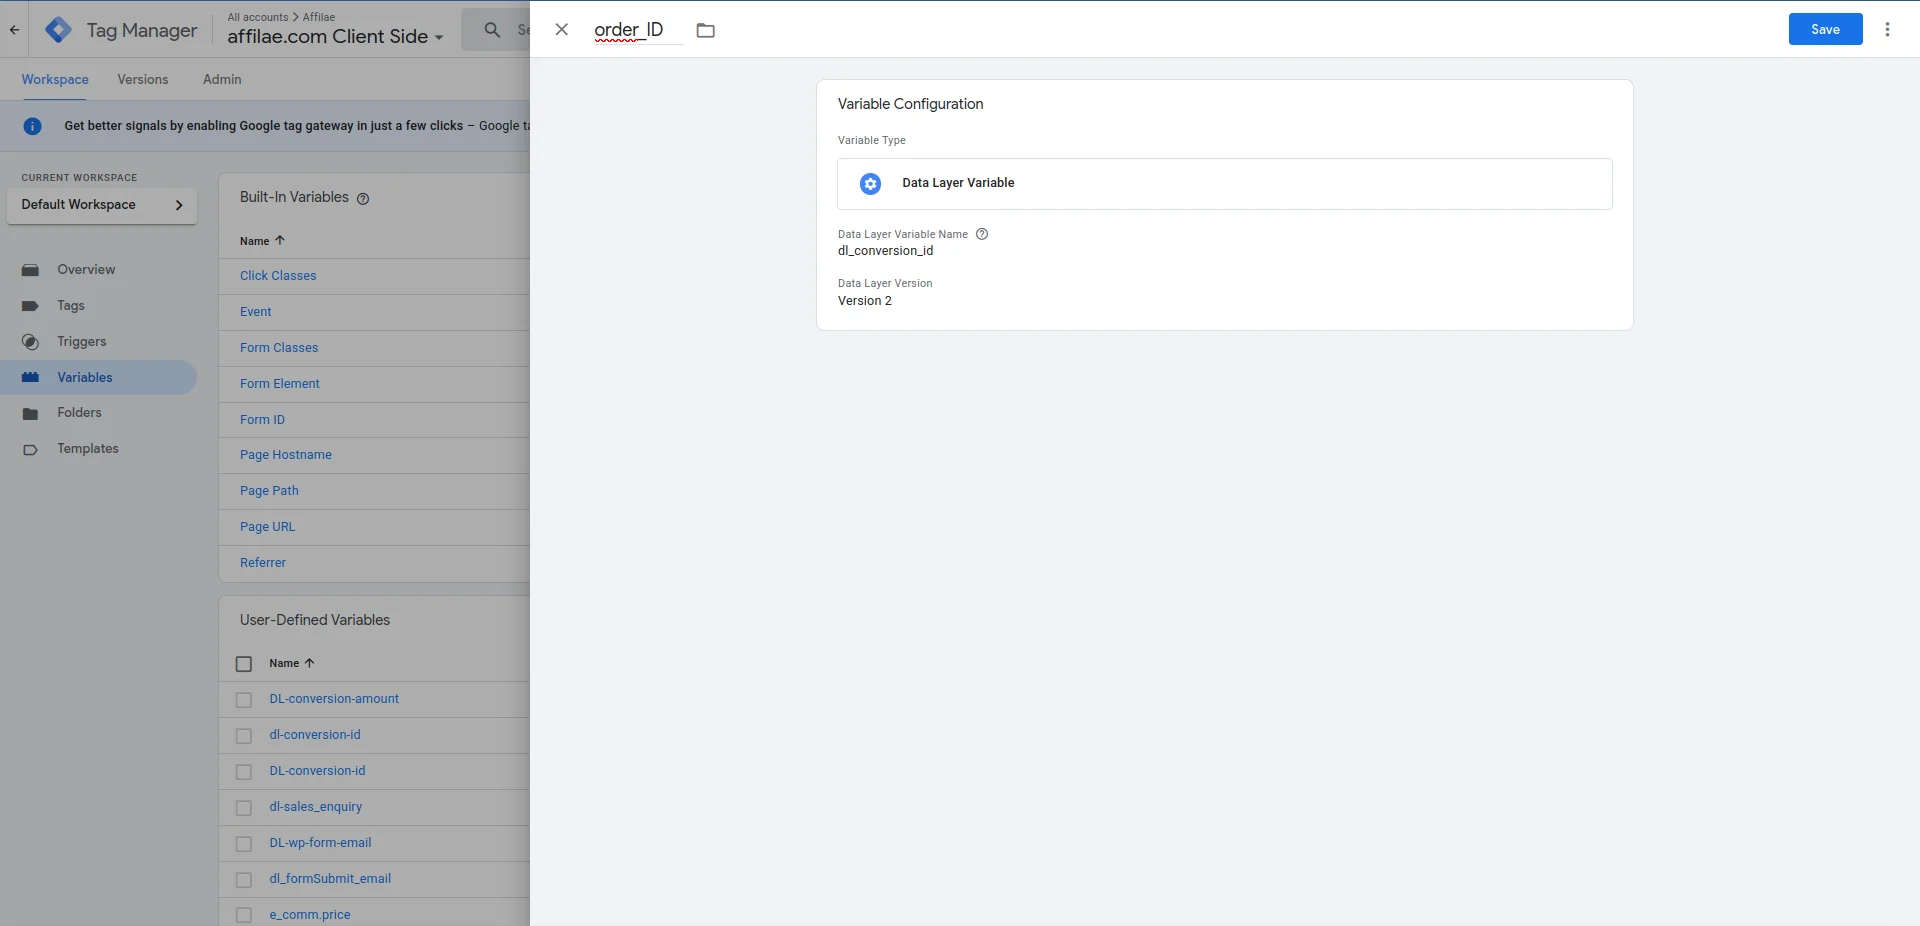
Create the conversion variables
- Go to Variables, then New.
- Choose the type data layer variable, the one available in your dataLayer.
- Create one variable per conversion data point.
- dl_conversion_id: unique order number.
- dl_conversion_amount: net sales amount, excluding taxes and shipping.
- dl_conversion_currency: currency (EUR, USD, etc.).
Create the trigger
- Go to Triggers, then New.
- Name it Purchase.
- Choose the type Custom Event.
- Configure it for your confirmation page.
Add the conversion template
- Go to Templates, then Search in Gallery.
- Add Affilae Conversion Tag.
Create the conversion tag
- Go to Tags, then New.
- Name it Affilae – Conversion.
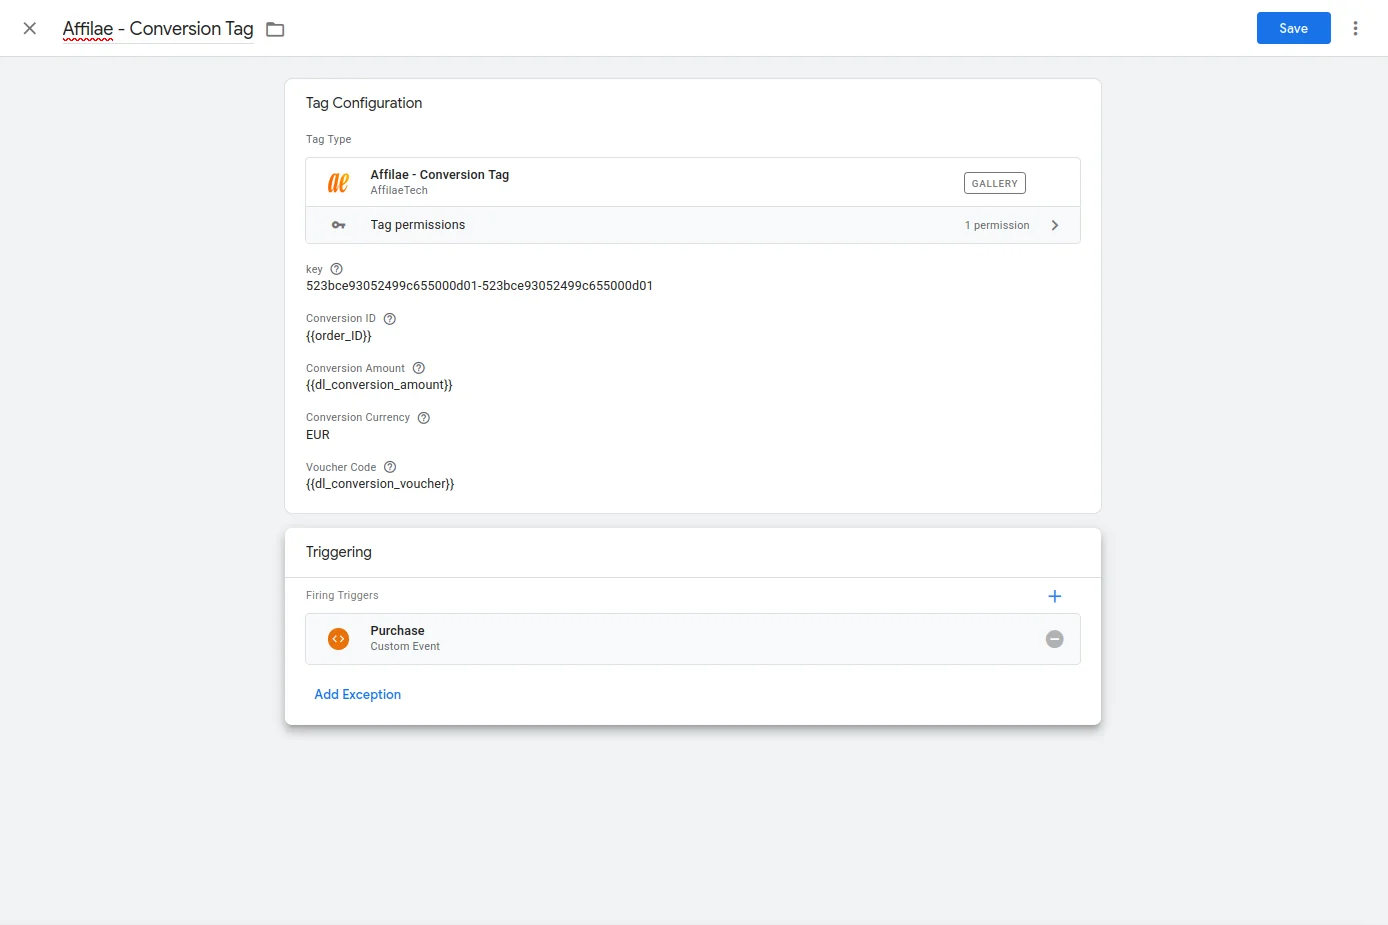
- Fill in the fields with your variables.
- In Trigger, select the trigger you created above, for example purchase.
- Save and publish.
| TAG FIELD | WHAT YOU ENTER |
|---|---|
| Key | Your Affilae key. |
| Conversion ID | {{dl_conversion_id}} |
| Conversion Amount | {{dl_conversion_amount}} |
| Conversion Currency | {{dl_conversion_currency}} |
Use the full variable path
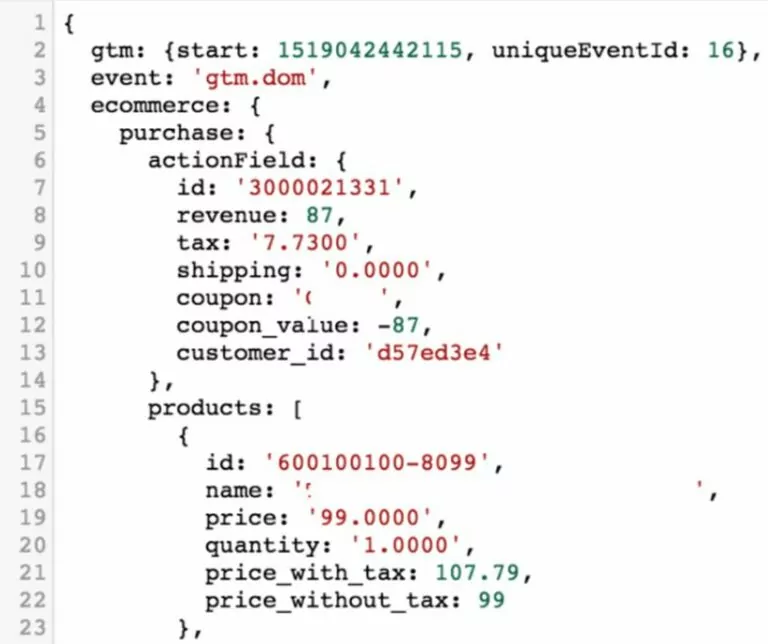
The data layer variable name must be the full path, for example ecommerce.purchase.actionField.id. A shortened name returns no value.
Finalize and test
- Publish your tags.
- Test the tracking of clicks and conversions.
Keep your templates up to date
Our tags are updated regularly. Every new version published in the gallery appears as a notification on the template, inside your container.
The other Google Tag Manager integrations
- C2S – GTM – Manual: you paste the Affilae scripts yourself into Custom HTML tags, without using the gallery.
- S2S – GTM: the conversion is validated server-side, with two containers talking to each other.
Related articles
- Affilae tracking fundamentals
- Testing click and conversion tracking
- Frequently asked questions, technical integration
- All available integrations
Frequently asked questions
In Affilae, open Settings, tab Tracking, then the Integration via an Affilae plugin panel. It displays your Program ID, your Key, your Rule ID and your Currency, each with a copy button.
First check that both tags are correctly installed and published. Then make sure the variables are correctly mapped, along with your Program_ID and your KEY. Finally, test with a real order. If the problem remains, contact Affilae support with your configuration details.
Your variable names must exactly match those in your site dataLayer. Also mind the full path: the data layer variable name reads for example ecommerce.purchase.actionField.id, not id alone.
No. Never send personal data, for example a first name, a last name or an email address. Stick to the order data needed to calculate the commission.
Yes. Our tags change regularly. Notifications on the template, inside the Templates section of your container, tell you about every new version to apply.
Yes, this integration assumes the Parameter format. Change it in Settings, section Global settings, field URL format. If you would rather stay on Server-to-Server, follow the S2S – GTM documentation instead.