

C2S – Prestashop
Discover the most-read articles
The Affilae module for PrestaShop installs click and conversion tracking straight from your store back office. You paste one script, you create your rules, and the module reports the orders.
It manages commission rules by product category, as well as the differentiation between new and returning customers.
Install the module
Download the module
- Download the Affilae module v1.19.1.
- Keep the ZIP file as it is: PrestaShop installs it without unzipping.
Install it in PrestaShop
- In the PrestaShop back office, open Modules.
- Click Upload a module.
- Select the downloaded ZIP file.
- Let the automatic installation run.
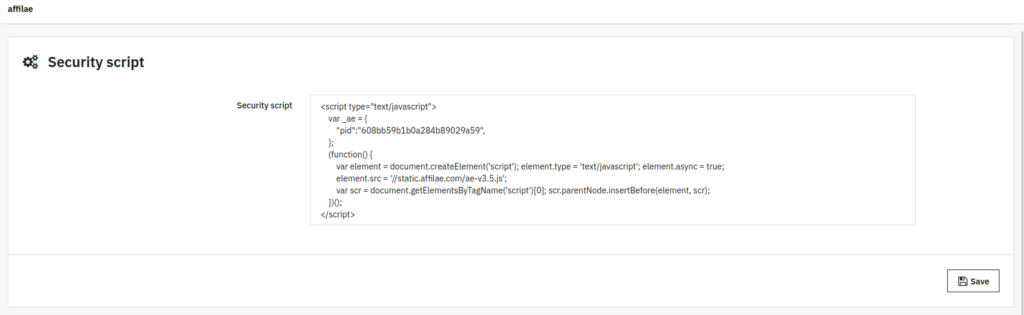
Add the security script (click tag)
Where to find it: in Affilae, open Configuration > tab Tracking > Custom integration (Script) > Track clicks.

How to install it
- Copy the full script from your Affilae interface.
- Paste it into the PrestaShop module configuration, field Security script.
- Click Save.
Configure your commission rules
For a general rule
- Title of the rule: for example All products.
- Key: copy and paste the value from your Affilae interface.
- Customer: Apply rule to all customers.
- Categories: choose All, the rule then applies to all categories.
- Save.
Where to find the key: in Affilae, open Configuration > tab Tracking > Integration via an Affilae plugin.

For category-based commissions
- Title of the rule: for example Electronics.
- Key: the key specific to this category.
- Select the category and its subcategories.
- Repeat for each category.
- Save.

Validation checklist
Installation, in PrestaShop
- Module v1.19.1 downloaded.
- Module installed and activated.
- Module configuration accessible.
Configuration
- Security script added.
- General rule created in the module, with its key from Affilae.
- Category rules created in the module, each with its own key, if applicable.
- All rules saved.
Test
- Click and conversion tests performed.
- Tracking validated with the Affilae documentation.
Related articles
- Tracking, product categorization
- Affilae tracking fundamentals
- All available integrations
- Frequently asked questions, technical integration
Frequently asked questions
Voir plus de questions reponses
Module version 1.19 is compatible from PrestaShop 1.7.2 up to 9.0.
Check that the security script is pasted in full in the module, and that each rule carries the key Affilae shows for its commission rule. Next, test with a real order. If the problem remains, contact Affilae support with your configuration details.
In Affilae, open Configuration, tab Tracking, then the Integration via an Affilae plugin panel. It displays your Program ID, your Key, your Rule ID and your Currency, each with a copy button.
Create one rule per category in the module, each with its own key. Remember to select the category and its subcategories, otherwise products in the subcategories are not covered.
Yes, the module handles that differentiation on top of the category rules. You set it in the Customer field of each rule: all customers, only new customers or only old customers.
Yes, on every plan. It needs your product feed in Affilae, matched on the product ID the module sends (the PrestaShop product ID).
Choose All: the rule then applies to your whole catalogue.
Download the latest version and install it the same way (Modules > Upload a module, then select the ZIP). Your security script and your commission rules are kept. Do not uninstall the module first: uninstalling deletes them.
Each order is sent in its own currency. In Affilae, add every currency your shop sells in to the Rule Currencies of each commission rule: an order in a currency the rule does not list is not recorded.
Orders already confirmed as paid when the confirmation page opens (card, PayPal…) are sent as paid. Orders still awaiting payment, such as bank transfer or cheque, get the status your rule sets in Status of new conversions not paid online.