Implémentation via Google Tag Manager – script HTML
Notes: ⚠️⚠️⚠️
- The URL format of your programme must be in parameter. You can change the URL format by going to your program’s configuration, then modifying the general settings.
- The affiliation tag for your website is different for each programme.
- The Affilae tag must be added to each page of your site, including the confirmation page.
- Check your CSP configuration .
“default-src ‘self’; style-src ‘self’ ‘unsafe-inline’; script-src ‘self’ ‘unsafe-inline’ https://static.affilae.com/; img-src ‘self’ https://static.affilae.com/ https://lb.affilae.com/; frame-src ‘self’ https://lb.affilae.com/; connect-src https://lb.affilae.com/”
The purpose of this guide is to help you implement Affilae tracking via Affilae HTML scripts.
1- Installing GTM To install the GTM container on your site, please follow the documentation for configuring and installing Google: support.google.com/gtm
2- Add the Affilae Tag Once GTM is installed, log into your account and navigate to your ‘Workspace’; from there, in the left-hand column, find and click on ‘Tags’.
- When the page loads, click on ‘New’ to create a new tag, then :
- Name your tag e.g tag_affilae (if you have existing tags you can follow the nomenclature).
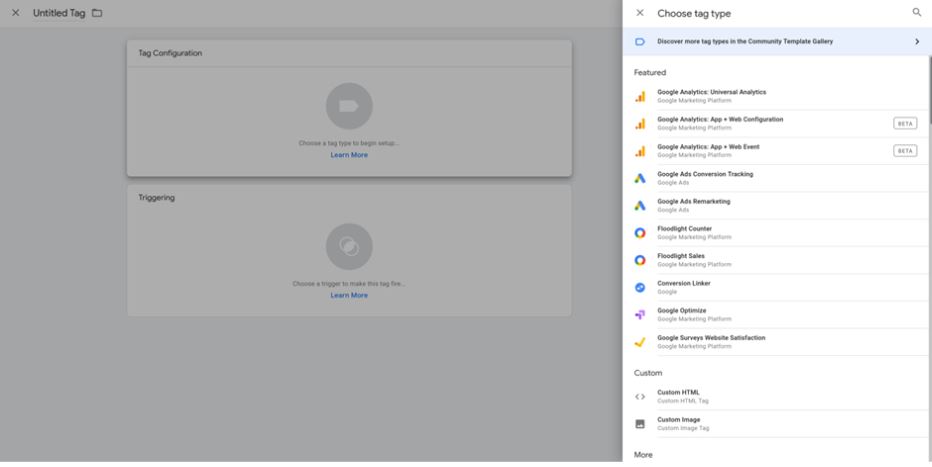
- Click in the ‘Tag configuration’ table, then in the right-hand menu that appears select ‘Custom HTML’.
- Copy and paste your Affilae Tag in the HTML field. You will find your script in the configuration of your programme in the ‘ tracking “ tab via the ” custom integration (scripts)’ section. Track clicks’.
The Affilae tag, which must be integrated on all the pages of your website (or landing pages), detects clicks from affiliated websites and protects you against click fraud.
![]()
- Once the Tag has been installed and the ‘pid “ filled in, click on the ”trigger’table, the menu of predefined triggers will appear and all you have to do is select ‘ All pages’.
- Save and send your changes.
Note: On the label, don’t forget to update the _ae variable to match your program ID (for example, 5f03acf00000000000000000).
3- Add the Affilae Conversion Tag
The Conversion Tag must be installed on the event or confirmation page for which you want to track conversions (e.g. sale, contact form…) and must only be triggered after the Affilae click tag.
Before going any further, it’s a good idea to understand how user-defined variables work. You can find the GTM documentation here.
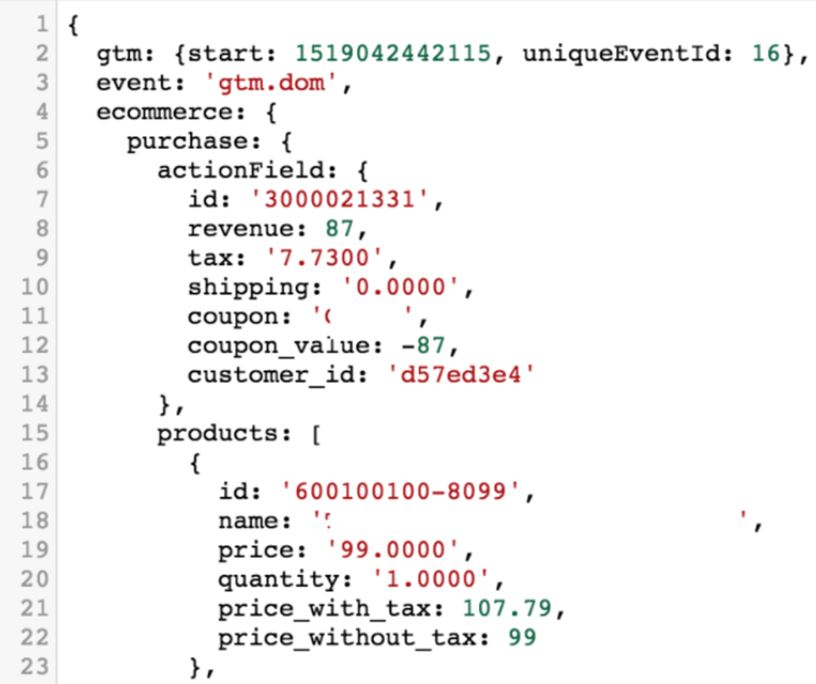
The Affilae conversion tag relies on user-defined variables, and these variables will need to be created by you using your site’s data layer. Each of the conversion data elements required for the tag to function correctly (event.Conversion.id, event.Conversion.amount…) must have a corresponding user-defined Variable to ensure that the conversion data is sent to Affilae.
Variables: From your Workspace in the left-hand column, find and click on ‘ Variables’.
- Click on ‘ New ’ to create a new variable
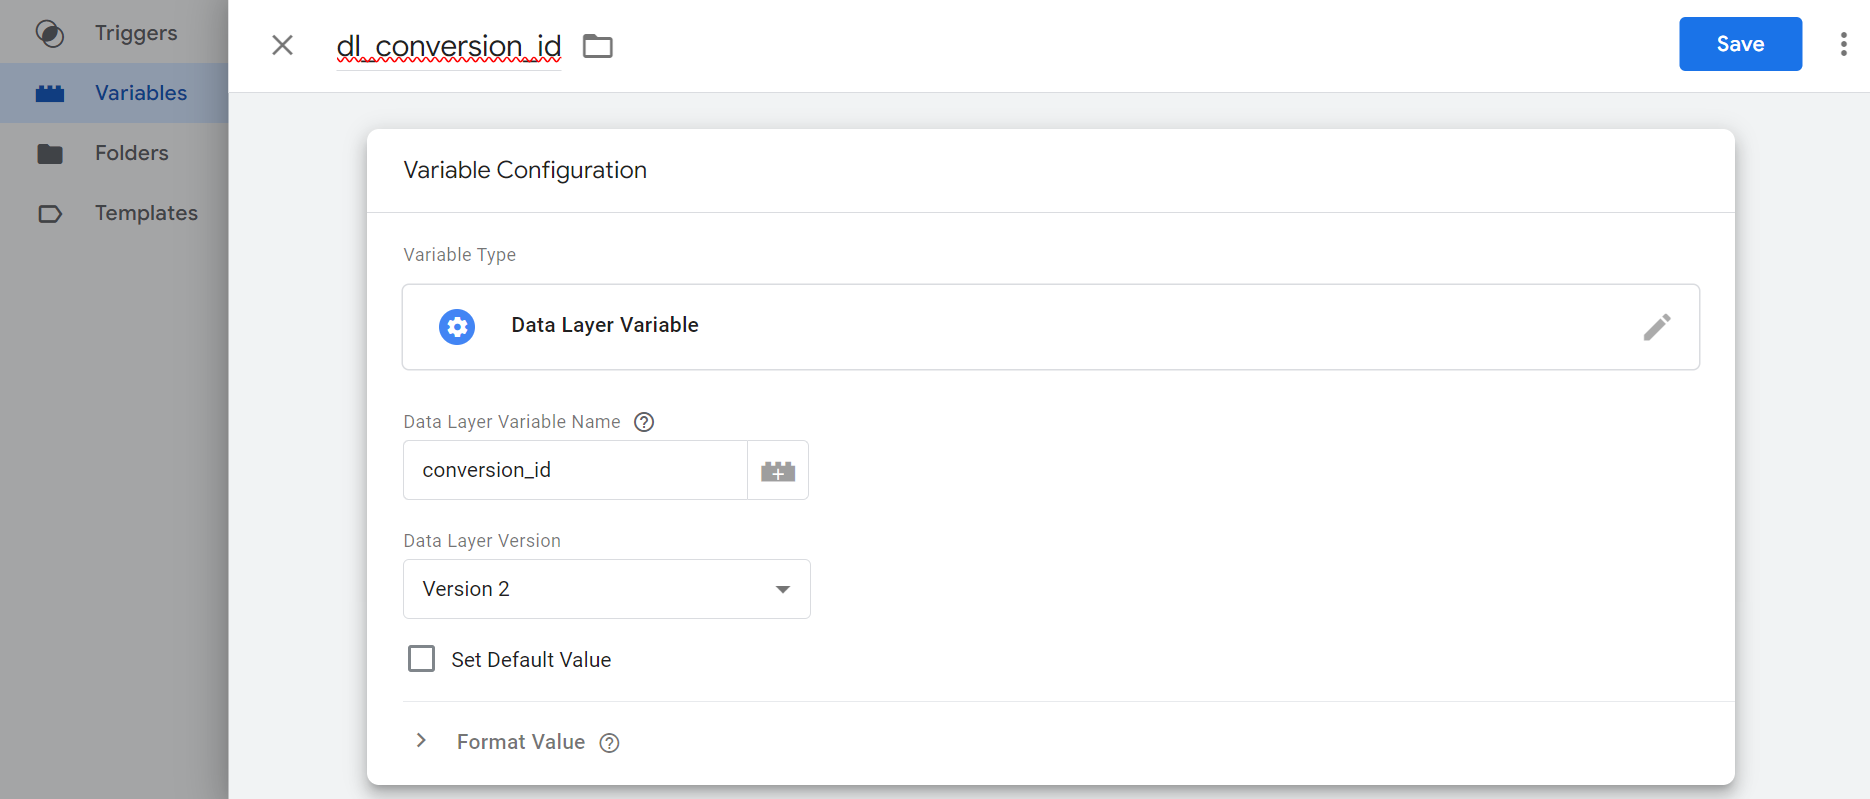
- Name your variable e.g. dl_conversion_id (if you have existing variables, you can follow the nomenclature).
- Click in the ‘ Variable configuration “ table, then in the right-hand menu that appears, select ” Data layer variable’.
- In the ‘ Data layer variable name ’ field, enter your value from the data layer of the page on your site where the conversion is taking place**.
- For ‘ Data layer version “, leave ” Version 2’.
- Save and go on to create the next variable.
WARNING: When entering the ‘ Data layer variable name’, as explained above, the value entered must correspond to the value found in the data layer.
Trigger: Once you have created your variables, you will need to create the trigger for your Affilae conversion tag. To do this, from your ‘ Workspace “ in the left-hand column, find and click on ”Triggers’.
When the page loads, click on ‘New ’ to create a new trigger, then :
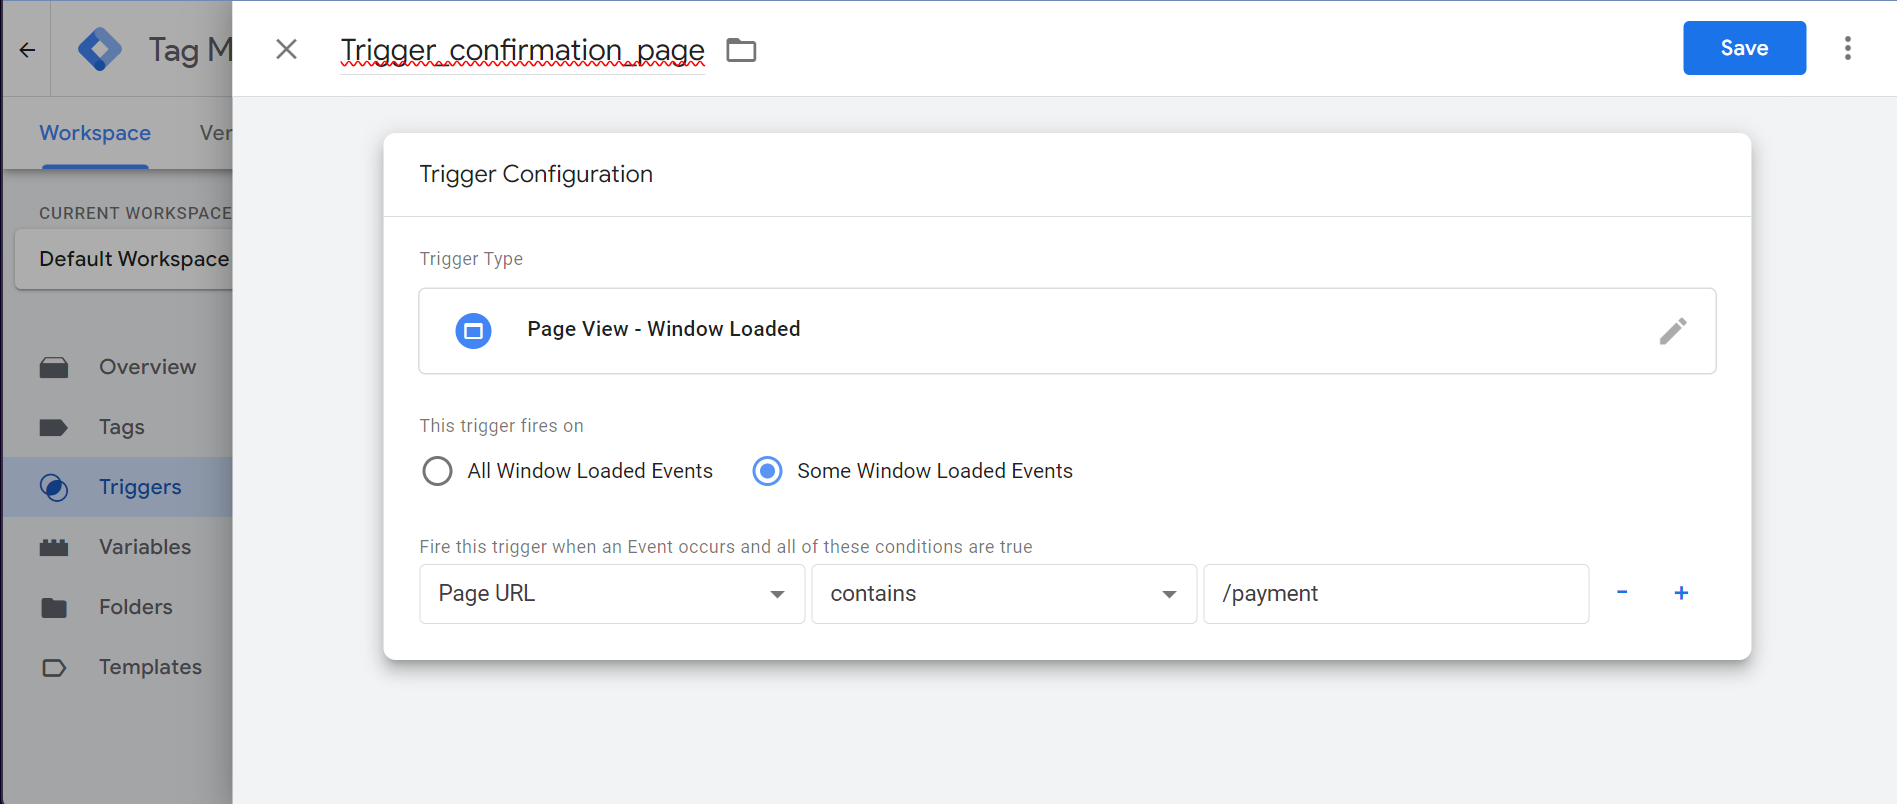
- Name your trigger e.g trigger_confirmation_page (if you have existing triggers you can follow the nomenclature).
- Click in the ‘ Trigger configuration ’ table, then in the right-hand menu that appears select the type of trigger that best suits your needs, generally the trigger is based on a Purchase event.
- Save and go on to create your Affilae conversion tag.
Conversion tag: From your ‘ Workspace’, in the left-hand column, find and click on ‘Tags ’. in the left-hand column, find and click on ‘ Tags’.
When the page loads, click on ‘ New ’ to create a new tag, then :
- Name your tag. e.g tag_affilae_conversion (if you have existing tags you can follow the nomenclature).
- Click in the ‘ Tag configuration “ table and then select ” Custom HTML’ from the menu on the right.
- Copy and paste your Affilae Conversion Tag into the HTML field, then fill in the variables you have created.
You will find your script in the configuration of your programme in the ‘ tracking “ tab via the ” custom integration (scripts)’ section. Track conversions”.
- Once the tag has been installed and the variables filled in, click on the ‘ trigger’ table, the triggers menu will appear and all you have to do is select the trigger you created in the previous step.
- Save and submit your changes.
Parameters to be entered :
| Variable | Mandatory | Value |
|---|---|---|
| key | yes | The key is provided on the “conversion code” page accessible from the “Config” menu of your affiliate program. e.g. 5f04fe700000000000000000-5f04fe700000000000000000 |
| id | yes | Fill this parameter with a unique identifier, the simplest being the order number.
If you’re using this code to subscribe to your newsletter and you don’t have a unique identifier, we advise you to use a Hash (e.g. MD5) from the surfer’s e-mail, for example. |
| amount | Yes for sales | Total amount of the order, excluding VAT, which will be the basis for calculating the commission and sales generated. e.g. 123.45 |
| payment | Yes if the conversion is linked to a payment | If conversions are subject to payment, specify the method chosen by your customer, otherwise leave blank:
|
| customer | Yes, if Revenue Share is enabled | Customer ID if Revenue Share is enabled. Please use an identifier that will not change over time, the best being the ID number used in your database.
Leave blank if you don’t use Revenue Share. |
| cv | No | Custom variable that will be returned with the conversion, and available in the interface and API. Allows you to assign your own identifier to a conversion. |
| voucher | No | Variable used to identify the promo code associated with a sale. The code is case-sensitive. Use `;` as separator to add multiple codes. |
| product | No | List of product IDs, separator `;`. |