You will find below how to quickly create your Affilae account in order to set up partnerships with advertisers.
Difference between account and profile
On Affilae, we must dissociate the notions of accounts and profiles.
To use Affilae you must have an account. Within this account, you will be able to create and manage one or more publisher profiles in order to apply for affiliation programs.
Why have several profiles?
Let’s say I have two blogs on different themes. I want to be able to work with specific brands for each of these sites.
I will therefore be able to create two distinct profiles with the same account, i.e. a unique connection email address, and differentiate the partnerships and their performances.
Special case: If you are a content creator and you publish on different social networks and/or your blog, you can have only one profile.
When configuring your profile, you can enter links that lead to your different social networks.
Creating an Affilae account:
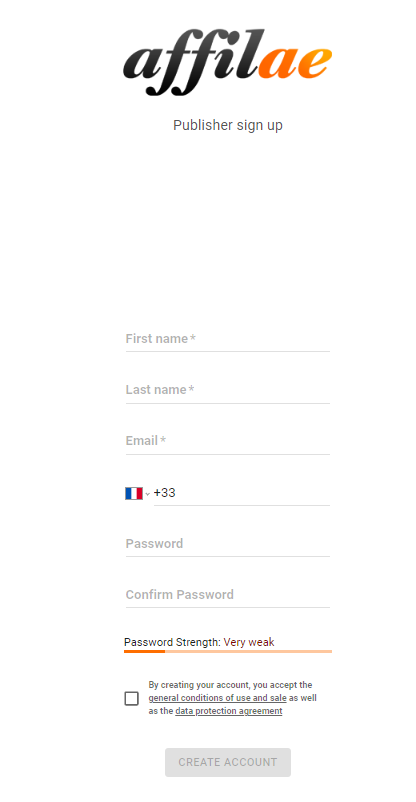
To create your publisher account you must go to Affilae and click on “become an affiliate” in the left menu. Otherwise, click here.
You will then have to fill in the following form:

Once the form is validated, you will be redirected to your Affilae interface.
Congratulations, you have just created your Affilae account !
Creating an editor profile:
Once your account is created, you must now create your first publisher profile in order to apply for programs and collaborate with brands.
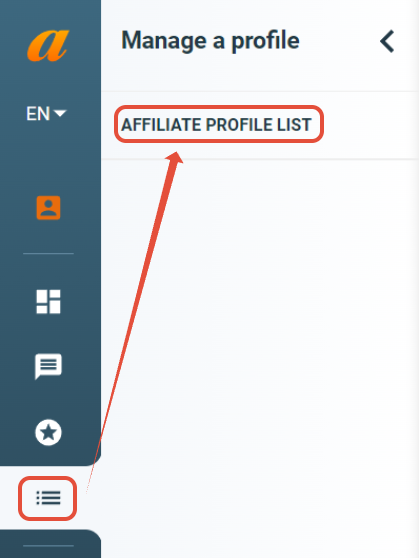
To do so, go to ” manage a profile” from the left menu > “Affiliate profile list“.

Once on the page, there is a “Add New” button on the top right.
You have to click on it and fill in the different fields to create a profile.

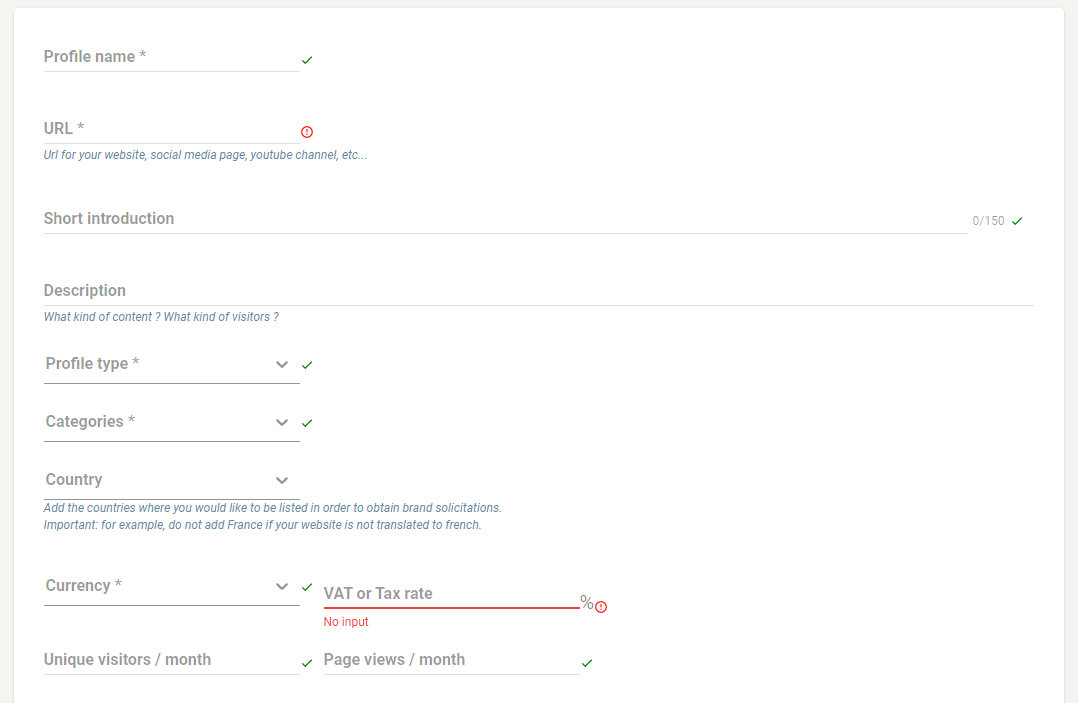
Editors’ profile creation form :
Below are the required fields to fill out when creating your profile.

- Profile name: Corresponds to the name of your website or the name on your social networks.
- Profile URL: Corresponds to the URL of your website or the link to your social network page.
- Short introduction: Introduce yourself in one sentence.
- Description: Introduce yourself at length. Who are you? What content and advertising features do you offer? The goal here is to make brands want to collaborate with you. This information will be available directly on your presentation form. Don’t miss your first impression!
- Profile type: Choose the type of profile according to your activity.
- Categories : You can choose several categories; they represent the core of your activity and the interests of your community.
- Country: Where is your community located?
- Currency: Select the main currency of your profile. This is the currency in which your reports will be displayed. Choosing a currency will not prevent you from working with brands that pay in different currencies.
- VAT: Fill in the correct VAT rate.
- Visitors / page views per month: Indicate the traffic of your site to advertisers. These fields are optional.
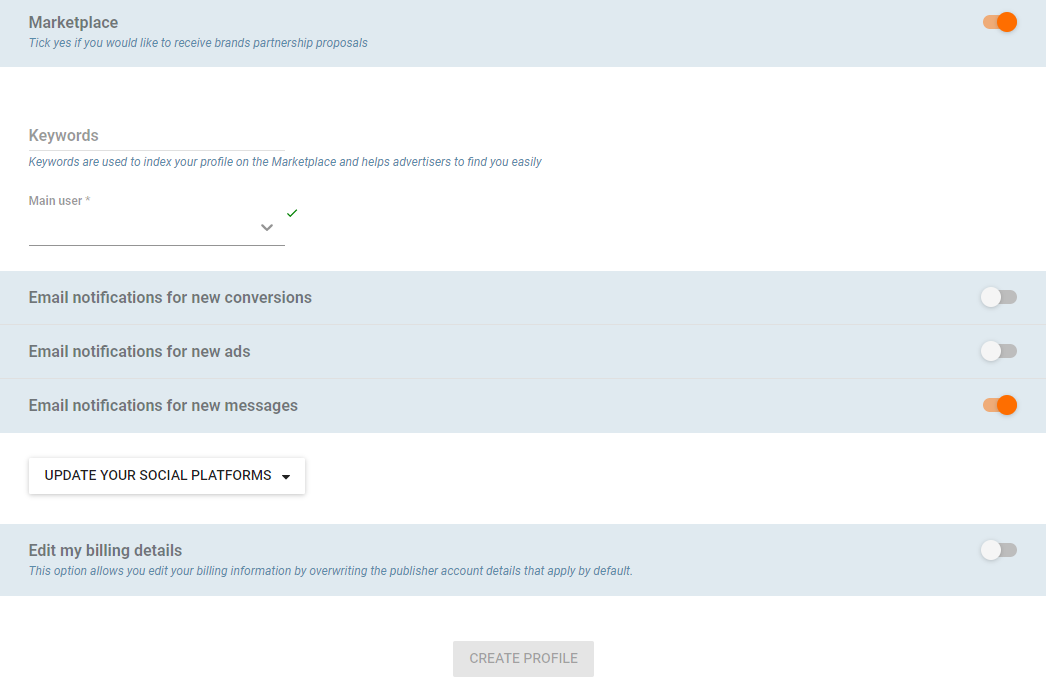
Here are some additional options:

- Appear on the marketplace: allows you to be visible to brands. They can then contact you to propose partnerships.
- Keywords: The keywords allow your profile to be referenced on the affiliate marketplace and advertisers to find you more easily.
- Notifications:
– New conversions: you will receive an email for each new sale made to an advertiser
– New ads: You will be notified when new ad elements are added to one of the partner programs.
– New messages: You will receive an email to let you know if you have received a new message via the Affilae internal messaging system.
- Edit your social networks: You will be able to indicate the links of your different social networks.
- Customize my billing information: Optional field. This option allows you to customize your billing information, overriding the publisher account information that applies by default.
Congratulations, you have just created your publisher profile!
You can now apply for programs and start your partnerships.
Share :

