Aucune catégorie trouvée.

Google Tag Manager – Templates

google tag manager
The implementation is carried out in three steps:
  • Installation of the GTM container on your website

  • Creation of the Affilae Tag for clicks

  • Installation of the Affilae Tag for conversions


Before you begin:
  • In addition to following the Google documentation, it is also recommended to understand how Affilae tracking tags work.

  • Note that Google Tag Manager can be affected by the use of Ad Blockers and cookie refusal (GDPR law and cookie banner).

  • The sequencing of Tags is very important; the click tag must always be loaded before the conversion tag.


Implementation via Affilae Templates
  • Follow Google’s official documentation to install Google Tag Manager (GTM) on your website:
    👉 support.google.com/gtm


  • Once the Affilae Template has been added to your workspace, navigate to the “Tags” menu in the left column and click on “New.”


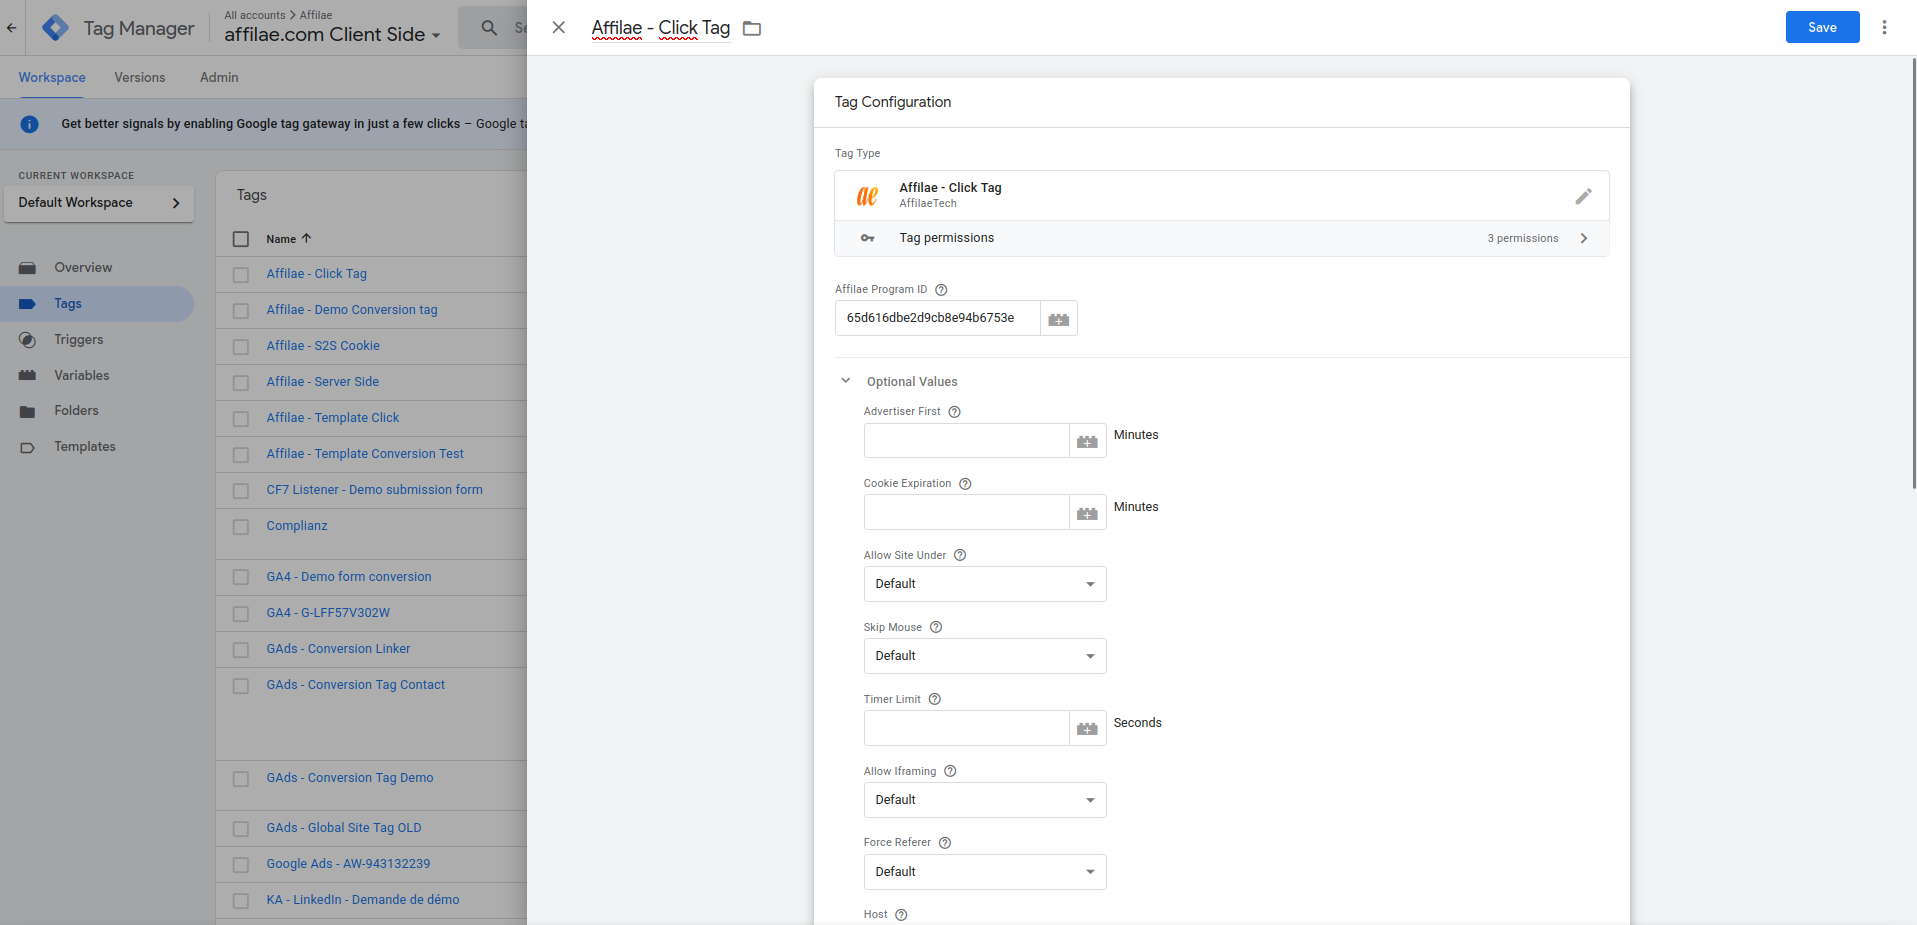
  • From the list of Tags, select the “Affilae – Click Tag” tag.


  • Name your tag, for example tag_affilae (if you have existing tags, you can follow the naming convention).
  • Click in the “Tag configuration” table, then in the menu that appears on the right, select “Affilae – Click Tag.


  • Enter your Program ID in the “Affilae Program ID” field (required field). You will find your program ID in your program settings in the ‘tracking’ tab under “integration via an Affilae module.


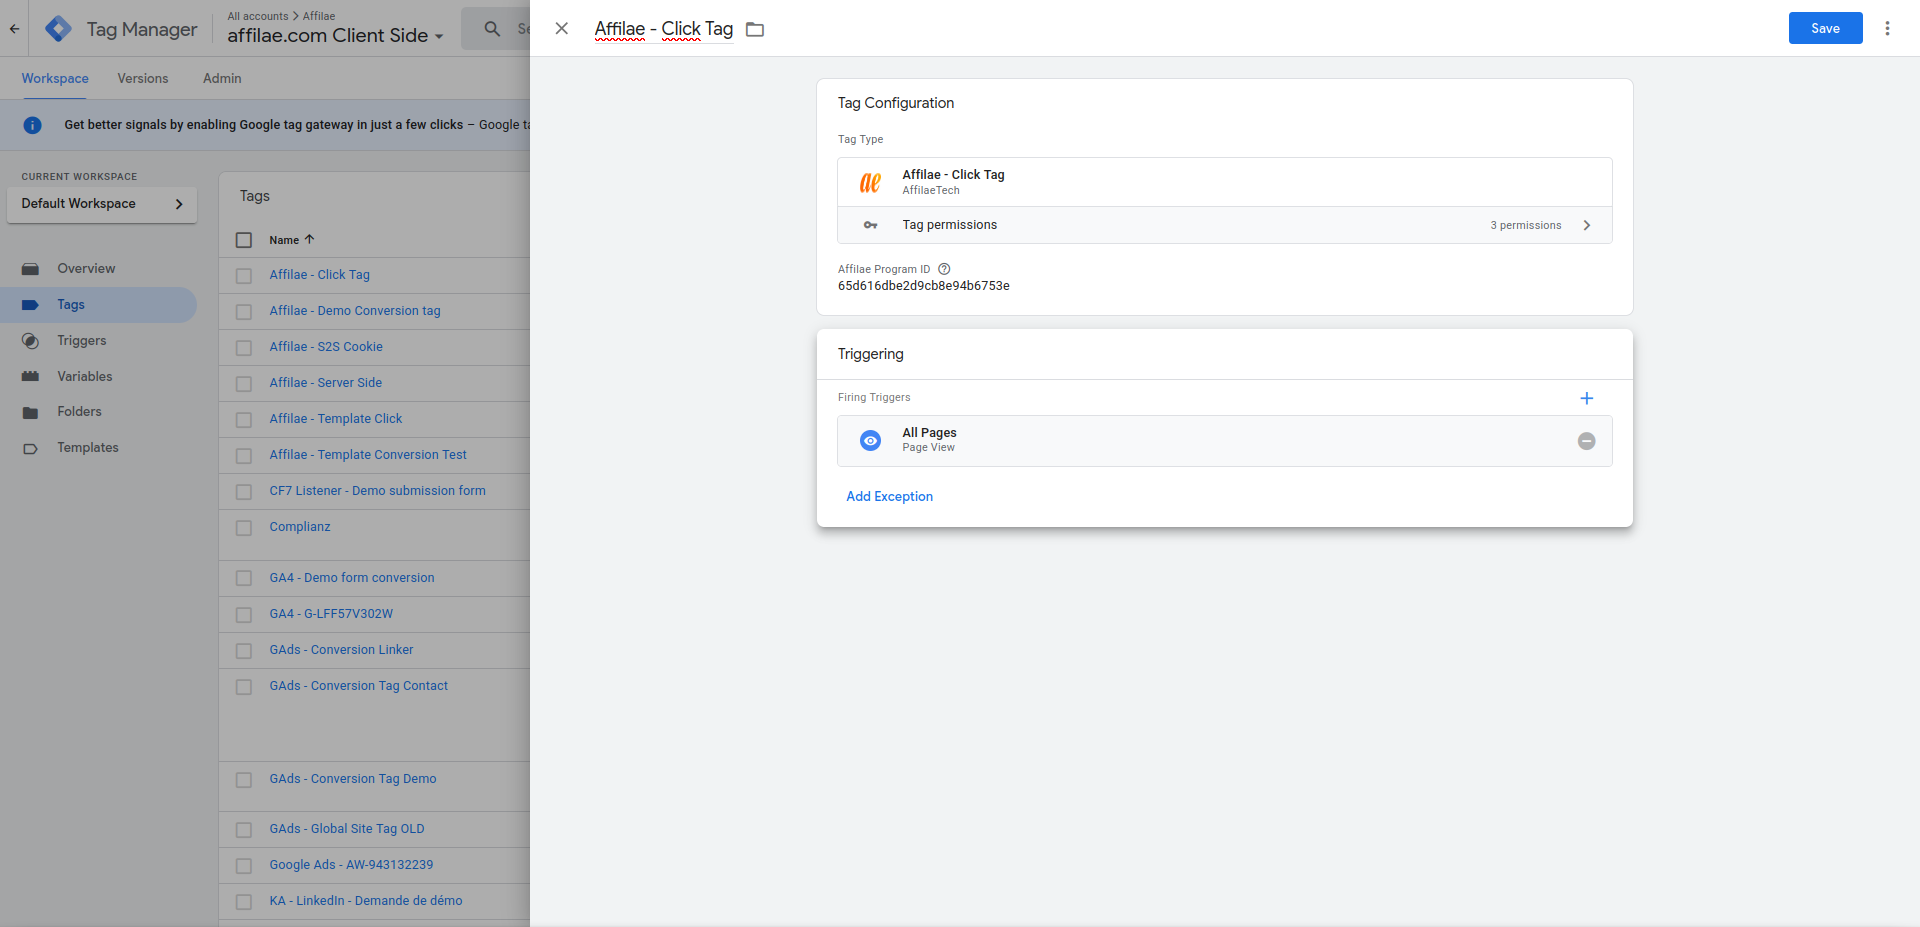
  • Once the tag has been installed and the “Affilae Program ID” entered, click on the ‘Trigger’ table. The menu of predefined triggers will appear, and you will simply need to select “All Pages
  • Save and submit your changes.
 
Add the Affilae Conversion Tag

The conversion tag must be installed on the event or confirmation page for which you want to track conversions (e.g., sale, contact form, etc.) and must only be triggered after the click tag.

Before going any further, it is a good idea to understand how user-defined variables work. You can find the GTM documentation here.

The Affilae conversion tag depends on user-defined variables, and these variables must be created by you using your site’s dataLayer.

 
Variables:
  • Go to “Workspace”

    • In the left column, click on “Variables”.

  • Create a new variable

    • In the “User-defined Variables” table, click on “New”.

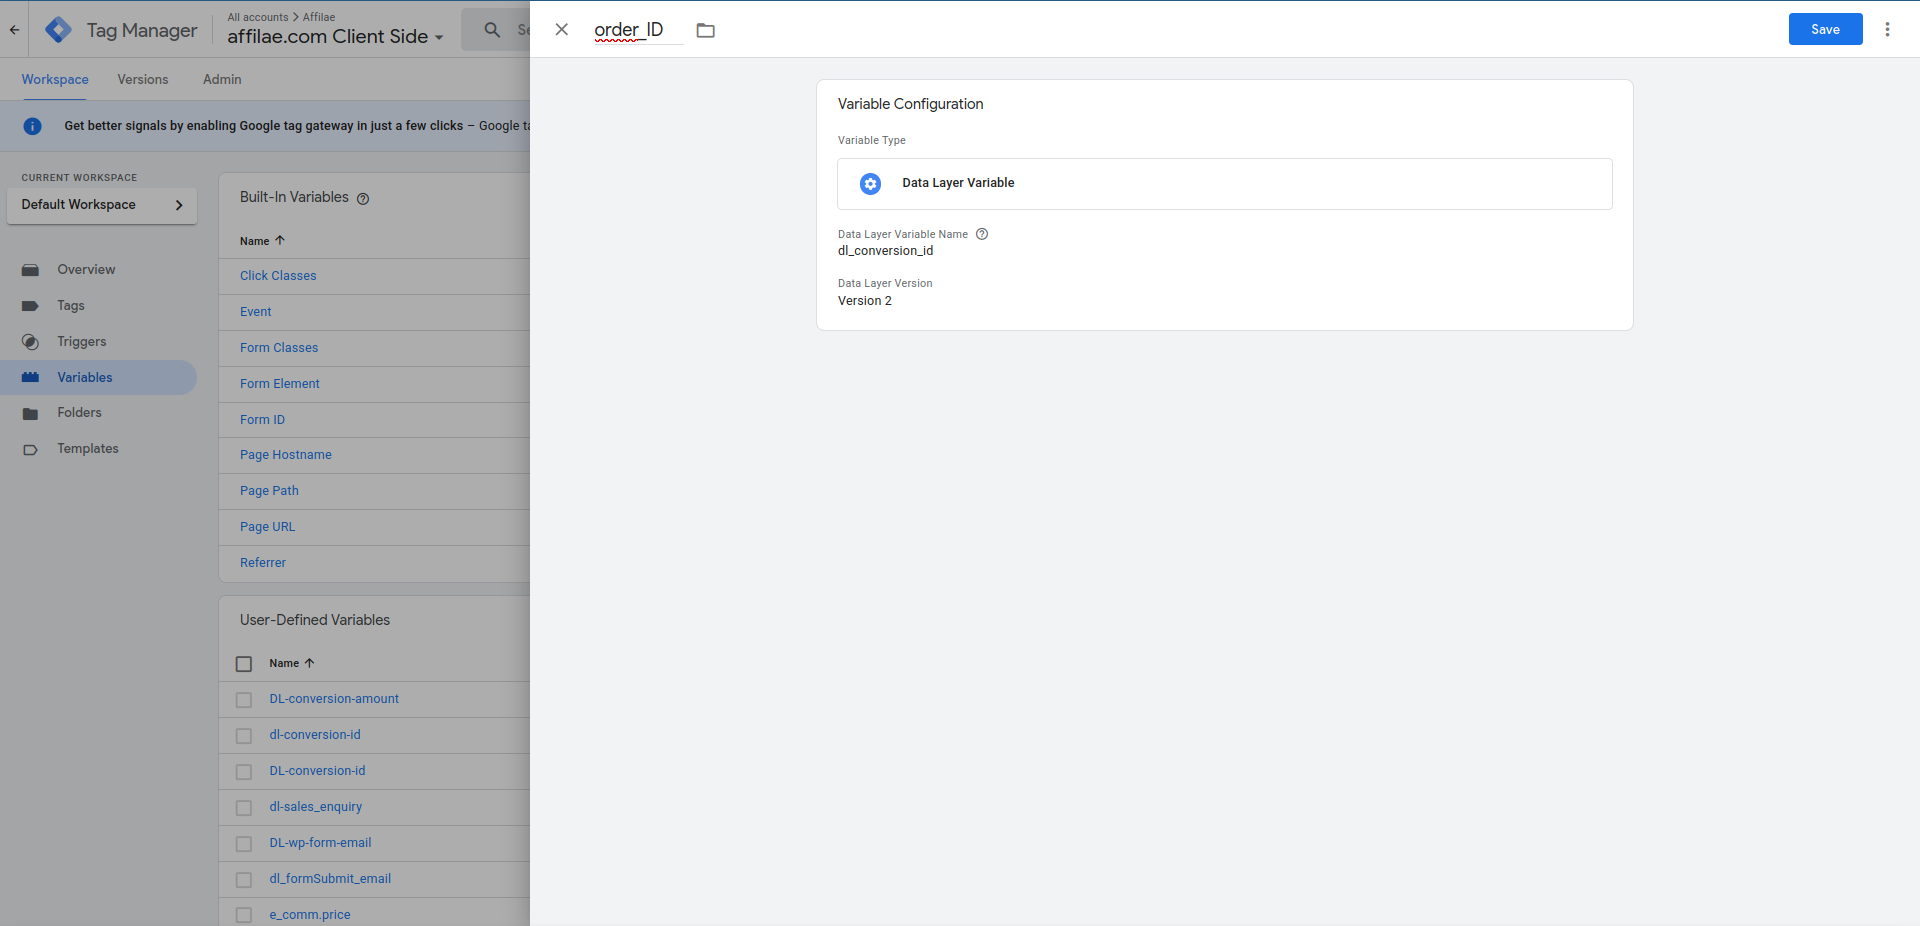
    • Give your variable a name, for example: dl_conversion_id.

You can follow the same naming convention as your existing variables.

  • Configure the variable

    • Click on “Variable Configuration”.

    • In the menu that opens on the right, choose “Data Layer Variable”.

  • Enter the dataLayer path

    • In the field “Data Layer Variable Name”, enter the exact value found in your website’s dataLayer (example: ecommerce.purchase.actionField.id).

  • Keep the default version

    • Leave “Version 2” in the field Data Layer Version.

  • Save

    • Click on “Save”, then create your next variable if needed.


WARNING:

  • Locate the value in the dataLayer

    • The “Variable Name” in GTM must exactly match the value present in the site’s dataLayer.

  • Simple case

    • If the dataLayer contains a single clear field (e.g. transactionId), simply enter this name in GTM


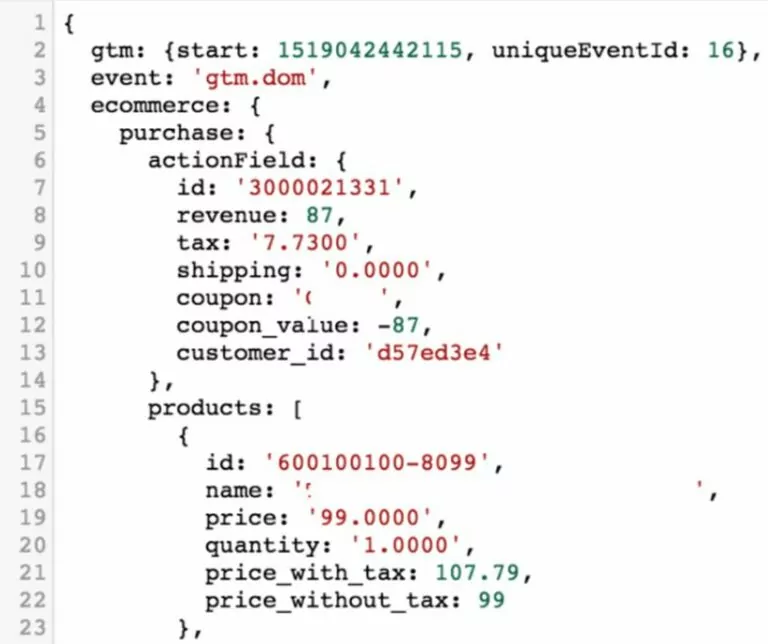
datalayer google tag manager

Here, for example: The name of the data layer variable must be: ecommerce.purchase.actionField.id (the path must be complete).

Trigger:
  • Go to “Workspace”

    • In the left column, click on “Triggers”.

  • Create a new trigger

    • Click on “New”.

    • Give your trigger a name, for example: purchase.

👉 You can follow the same naming convention as your existing triggers.

  • Configure your trigger

    • In the “Trigger Configuration” panel, a menu appears on the right.

    • Choose the trigger type that matches your needs.

    • Simple example:

      • If you have a specific URL (such as a purchase confirmation page), choose “Custom Event”.

  • Save

    • Click on “Save”.

  • Proceed to creating your Affilae Tag

    • Now that your trigger is ready, you can create the Affilae conversion tag (see the steps in the previous guide).


Conversion Tag:
  • Go to “Workspace”

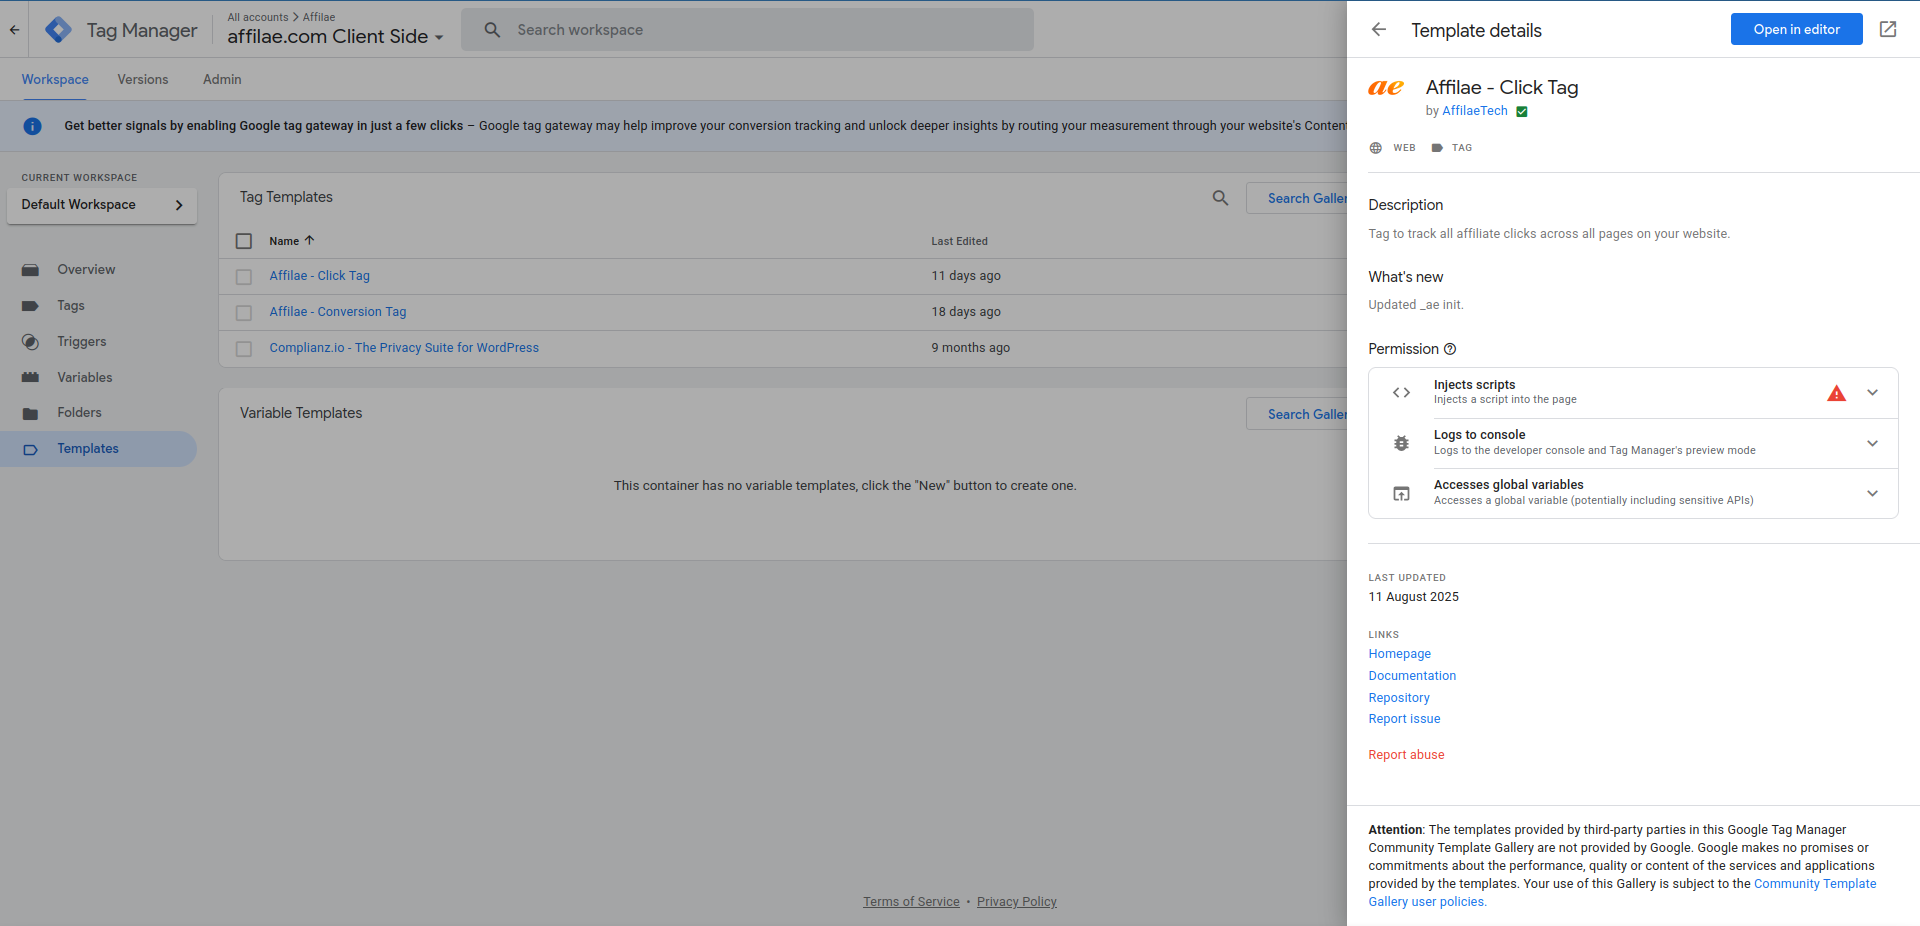
    • In the left column, click on “Templates”.

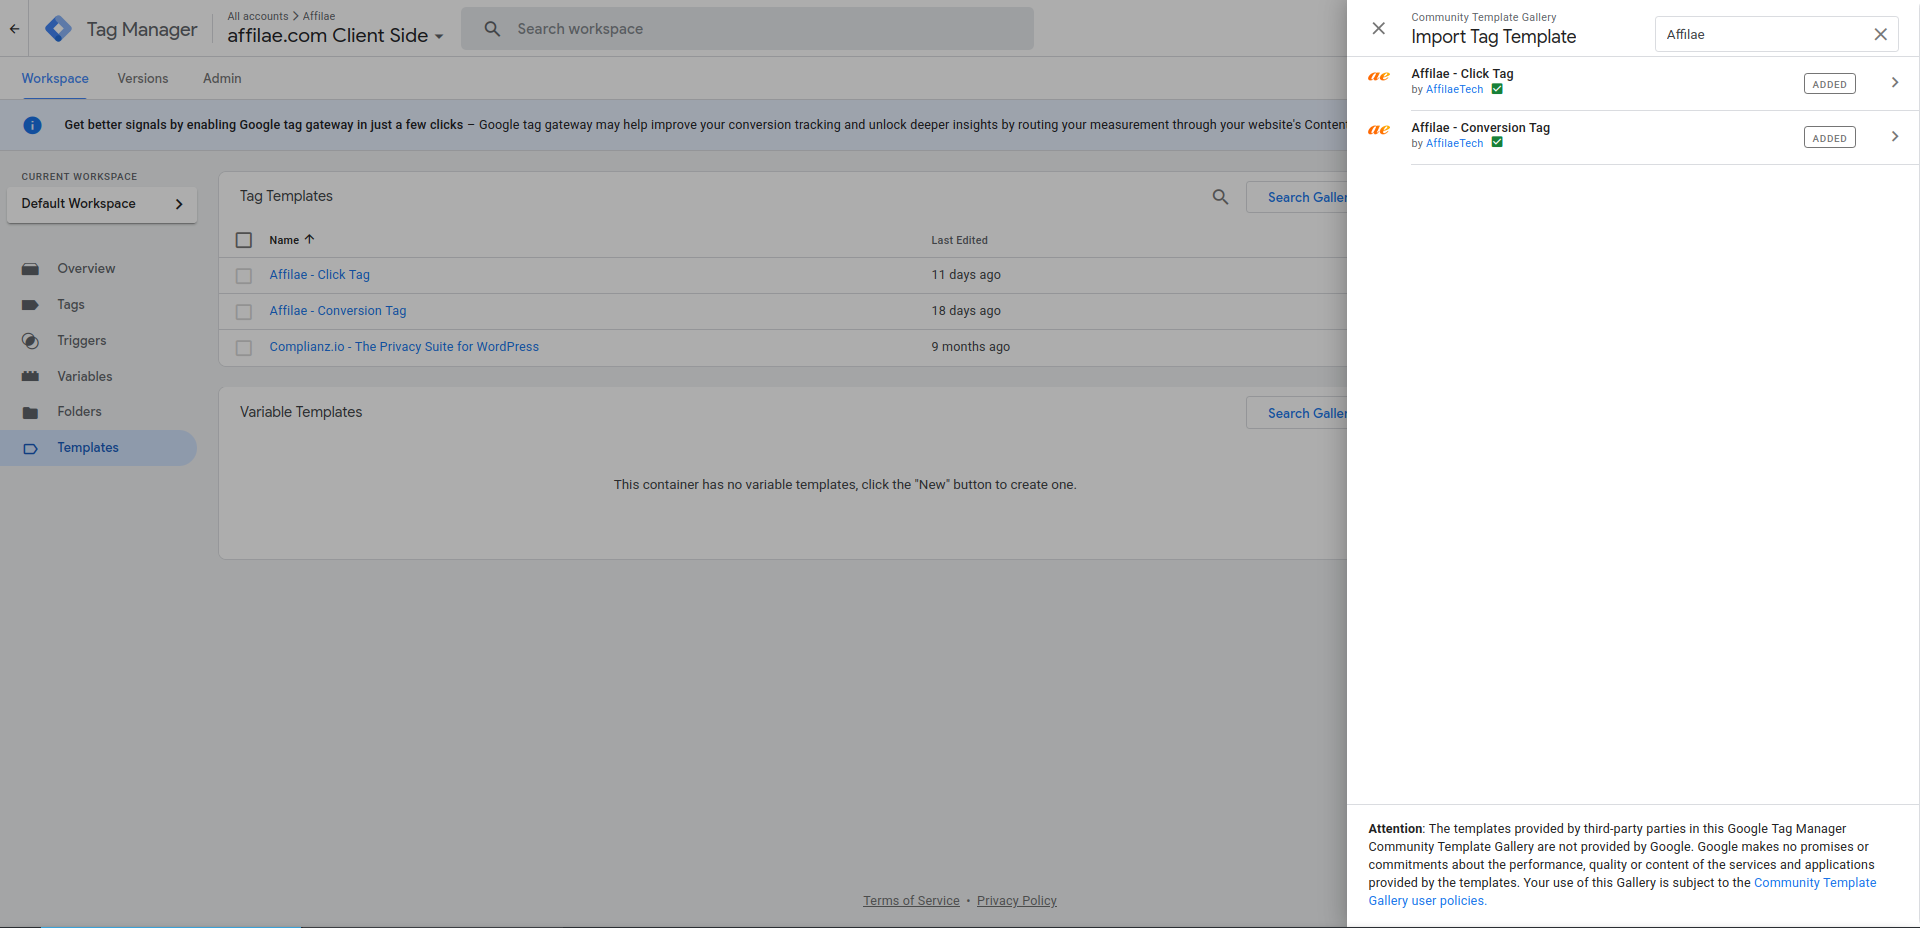
  • Find the Affilae template

    • In the “Tag Templates” panel, click on “Search Gallery”.

    • Type “Affilae” in the search bar.

    • Find the template “Affilae Conversion Tag”.

    • Click on “Add to workspace”.

  • Create a new tag

    • In the left column, go to “Tags”, then click on “New”.

    • Select the “Affilae Conversion Tag”.

    • Give your tag a name, for example: tag_affilae_conversion.

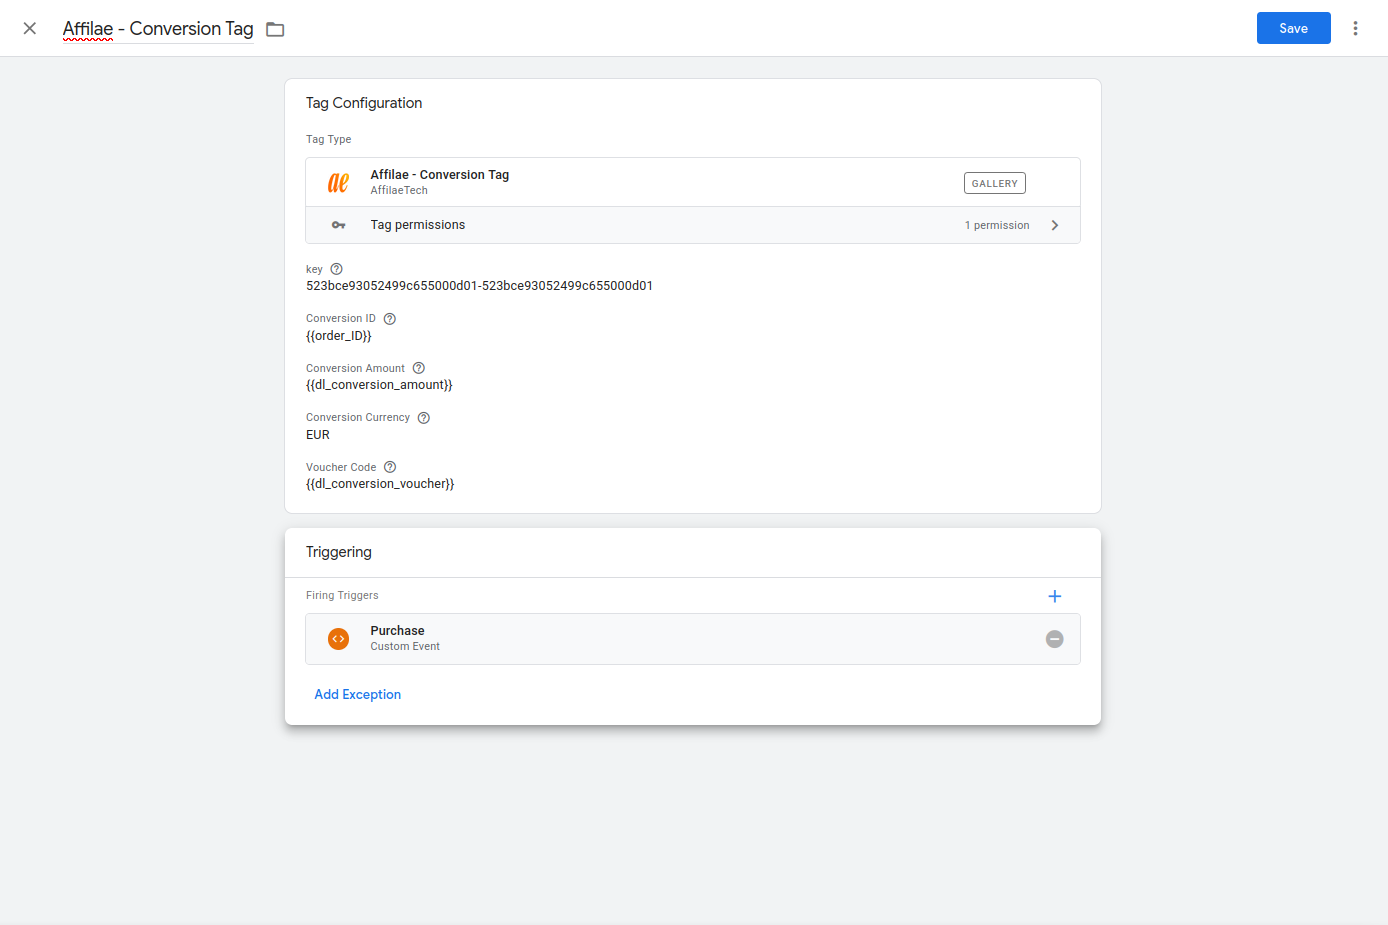
  • Fill in the tag configuration

    • In the “Tag Configuration” panel, enter:

      • Key

      • Conversion ID

      • Conversion Amount

      • Conversion Currency

👉 These are the only required fields. The others are optional.

  • Add a trigger

    • Click on the “Triggering” panel.

    • Choose the Trigger you created earlier.

  • Finalize

    • Click on “Save”.

    • Then click on “Submit” to apply your changes.